Showing posts with label Windows Phone. Show all posts

Sunday, July 6, 2014

Making animations In Store Apps

With the application development with XAML is little bit complex with user interface need animations , no matter which kind of application you gonna build. 

This post will demonstrate about how to make simple animation with XAML application with the help of Blend for Visual Studio(Former Microsoft Expression Blend). With visual studio 2012 onwards Blend for Visual Studio is free tool that installed with the Visual Studio.

1. Create your XAML based application in Visual Studio  (It may be WPF, Windows Phone or Windows Store App).
2. Open XAML interface in Design View and add relevant controllers to it. In here we just adding rectangle and we are going to create animation that  rectangle moves and rotate 360 degrees.
3. Select XAML (.xaml) file in  Solution Explorer and select Open in Blend Option


Here how its look like

4. Then select the rectangle and click on the  (+) button on the Object and Timeline window and add name to the animation (Storyboard) in here we named it as animationDemo

5. Now you can see the interface like the timeline.


6. Select the object you need to animate. this time its rectangle. then hold the Yellow color line on the timeline and drag it to the time period you need to appear the animation. (Ex : 5 msec) then drop it and make the changes that you need to  do within that time period to the object.


7. Then play it using play button and check the animation is done. and Save.
8. but not yet over. even animation created its not playing while the application run time. To do that go to code behind and place that where you need to play the animation . This case it need to play on the start.
go to place  where animation need to play  and paste this code .
animationDemo.Begin();


then You are done with it. See the code behind the XAML page. Blend does some serious codeing for you, in this case it like this.

<Storyboard x:Name="animationDemo">
            <DoubleAnimation Duration="0:0:5" To="767.164" Storyboard.TargetProperty="(UIElement.RenderTransform).(CompositeTransform.TranslateX)" Storyboard.TargetName="rectangle" d:IsOptimized="True"/>
            <DoubleAnimation Duration="0:0:5" To="-10.448" Storyboard.TargetProperty="(UIElement.RenderTransform).(CompositeTransform.TranslateY)" Storyboard.TargetName="rectangle" d:IsOptimized="True"/>
            <DoubleAnimationUsingKeyFrames Storyboard.TargetProperty="(UIElement.RenderTransform).(CompositeTransform.Rotation)" Storyboard.TargetName="rectangle">
                <EasingDoubleKeyFrame KeyTime="0:0:5" Value="0"/>
                <EasingDoubleKeyFrame KeyTime="0:0:10" Value="219.832"/>
            </DoubleAnimationUsingKeyFrames>
        </Storyboard>


Full Code In Media Fire 
http://bit.ly/blendDemo


Saturday, July 5, 2014

Universal Apps in Visual Studio

With Visual Studio 2013 Update 2 You can see the new changes in New project dialog box in Visual studio. One of them are new project type called Universal App.

With this kind of project template we can create Universal apps fro  Windows 8.1 and Windows Phone 8.1 once with same solution .


Once project  created in solution explorer you can see that there is  three separate projects


1. Windows 8.1
2. Windows Phone 8.1
3. Shared

With this templates it does is it shared separate section (such as project here) for Model (Coading part and data manipulation).
 All Projects in these ki of solution used that shared code for data manipulation.


With other two projects each one implements their platform specific User interfaces and functionalists with those projects. In here your Windows 8.1 UI codes should be in Windows 8.1 Project and Windows Phone UI codes must be in Windows Phone 8.1 Project.

 As you can see here each project refers the shared code base


And Specialty both Windows 8.1 and Windows Phone 8.1 Projects are sharing the same App.xaml and App.xaml.cs file. That means it defines the all application build settings to the each platform.

If you need to change something on Windows Phone 8.1 App you need to add that code in between 
#if WINDOWS_PHONE_APP
//Code 
#endif


In Compiling the project you can select which project need to be run like below with debug menu


And finally... Better to add 3rd party references separately with Windows 8.1 an Windows Phone 8.1 projects because there may be some derivations among libraries with two platforms..


Enjoy your Universal app with Visual Studio 203 update 2


Working with accelerometer Windows devices (8.1)

Previously on windows 8 developers can access the accelerometer function on windows devices with  the library Windows.Devices.Sensors 


using Microsoft.Devices.Sensors;

But with the Microsoft come up with the Windows 8.1  and Windows Phone 8.1 this Microsoft.Devices.Sensors library is missing and the methods that developers used are slightly changed with new library. 

Windows 8.1 and Windows Phone 8.1 developers can access the normal accelerometer with expanded Windows.Devices.Sensors library
 
using Windows.Devices.Sensors;

With this code it will demonstrate about the Windows Phone App. But this method is universal among Windows 8.1 and Windows Phone 8.1 Apps

Lets Begin .....

1. Define the Accelerometer and initialize it for initialize use Accelerometer.GetDefault()method

public Accelerometer accelerometer { get; set; }
accelerometer = Accelerometer.GetDefault();

2. Cehck the accelometer is working or not and f it is avilable create Accelerometer readig capturing event

if (accelerometer != null)
               {
                   // Select a report interval that is both suitable for the purposes of the app and supported by the sensor.
                   // This value will be used later to activate the sensor.
                   uint minReportInterval = accelerometer.MinimumReportInterval;
                   desiredReportInterval = minReportInterval > 16 ? minReportInterval : 16;
                   accelerometer.ReportInterval = desiredReportInterval;
                   //add event for accelerometer readings
                   accelerometer.ReadingChanged += new TypedEventHandler<Accelerometer, AccelerometerReadingChangedEventArgs>(ReadingChanged);
               }
               else
               {
                   MessageDialog ms = new MessageDialog("No accelerometer Found");
                   ms.ShowAsync();
               }


developer can assign any value to desiredReportInterval. to archive highest efficiency here we using method to get the minimum interval between two accelerometer report feeds.

With UI , its having three text boxes that named as corX,corY and corZ  to show the results of accelerometer readings. with the accelerometer reading event you can get the readings as follow

/// <summary>
        /// reading accelerometer changes
        /// </summary>
        /// <param name="sender"></param>
        /// <param name="args"></param>
        private async void ReadingChanged(Accelerometer sender, AccelerometerReadingChangedEventArgs args)
        {
            await Dispatcher.RunAsync(CoreDispatcherPriority.Normal, () =>
            {
                AccelerometerReading reading = args.Reading;
                corX.Text = String.Format("{0,5:0.00}", reading.AccelerationX);
                corY.Text = String.Format("{0,5:0.00}", reading.AccelerationY);
                corZ.Text = String.Format("{0,5:0.00}", reading.AccelerationZ);
            });
        }


Here is Screen shot


Full Code In Media Fire 
http://bit.ly/1xxeQhn


Wednesday, July 2, 2014

AutoSuggestBox in Winows Phone 8.1

This is completely new controller for windows store app development that comes with Windows Phone 8.1 . But this still not available to Windows 8.1 or 8.1 Update 1.

Very cool feature feel like combo box and text box both are in together.


Here is the XAML code for controller.
<AutoSuggestBox x:Name="suggestions" HorizontalAlignment="Left" Margin="52,62,0,0" 
ItemsSource="{Binding }" VerticalAlignment="Top" 
Width="296" TextChanged="suggestions_TextChanged" 
SuggestionChosen="suggestions_SuggestionChosen"/>

You need to bind observationCollection with AutoSuggestBox .

You can define what will happen when text changed and item selected as this

 private void suggestions_TextChanged(AutoSuggestBox sender, AutoSuggestBoxTextChangedEventArgs args)
        {
            if (args.Reason == AutoSuggestionBoxTextChangeReason.UserInput)
            {
                Suggestions.Clear();
                Suggestions.Add(sender.Text + "1");
                Suggestions.Add(sender.Text + "2");
                Suggestions.Add(sender.Text + "3");
                Suggestions.Add(sender.Text + "4");
            }
        }

private void suggestions_SuggestionChosen(AutoSuggestBox sender, AutoSuggestBoxSuggestionChosenEventArgs args)
        {
            suggestions.Text = "Choosen";
        }


Here is screen Shot


Full Code In Media Fire 
http://bit.ly/TOOVCO


Friday, March 14, 2014

Working with LiveSDK

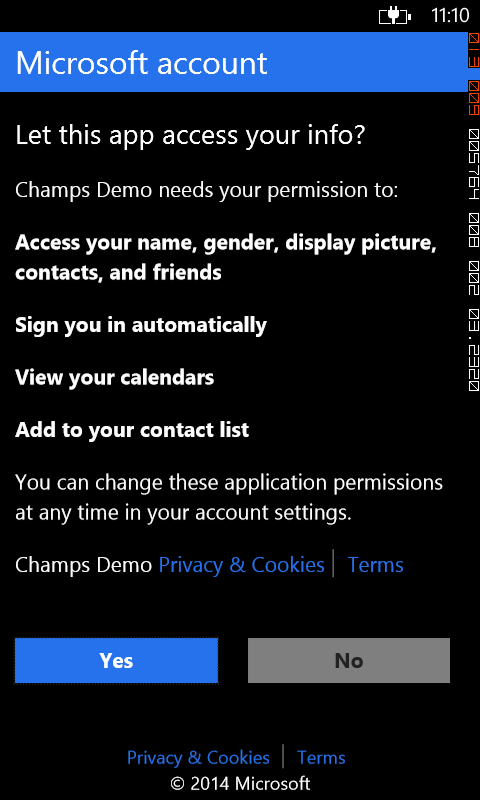
Live SDK enables you to make connect users in to Live account.

As a developer you can access each logged users
  1. Contacts.
  2. Calender.
  3. Sky drive (one drive).
In this post i'm gonna explain how to use Live SDK and demo about how to get Contacts :)


Here we go,
First You need to have Live App
To create live app goto  http://msdn.microsoft.com/en-US/live/  and in there in My Apps tab create your own app .. We need CLIENT_ID for our Mobile Application.

Installing LiveSDK 
  Create New Windows Phone Databound App

  Go to Tools -> Nuget Package Manager -> Package Manager Console In the console then type


 Install – Package LiveSDK
 Or 
You can use Visual Studio Extension Manager and search LiveSDK and install 

Add Login Button to Application
Go to XAML page that yo want to add Login Button and Paste this inside the Header. 

xmlns:live="clr-namespace:Microsoft.Live.Controls;assembly=Microsoft.Live.Controls"


Then add your XAML Button from this code .(Replace CLIENT_ID to your App's CLIENT_ID)
 <live:SignInButton Scopes="wl.basic wl.signin " ClientId="CLIENT_ID" Branding="MicrosoftAccount" SessionChanged="SignInButton_SessionChanged" VerticalContentAlignment="Top" Height="100" Margin="-10,0,10,497" VerticalAlignment="Bottom"/>
            

Scopes ??
Scopes define what kind of data that you can access through your app. This link provide detailed summery of Scopes in Live Client
http://msdn.microsoft.com/en-us/library/live/hh243646.aspx   

**In My case for just access the contacts I don't need any extended scopes just wl.basic wl.signin is enough.

assume you need to access user calender for that you need to add another field to Scopes as wl.calendars

Then Add This Code part to your C#

private async void SignInButton_SessionChanged(object sender, Microsoft.Live.ControlsLiveConnectSessionChangedEventArgs e)
        {
            if (e.Status == LiveConnectSessionStatus.Connected)
            {
                client = new LiveConnectClient(e.Session);
                try
                {
                    LiveOperationResult result = await client.GetAsync("me/contacts");
                    dynamic opresult = result.Result;

                    List<contact> contactList = new List<contact >();

                    foreach (var item in opresult.data)
                    {
                        contact dummy = new contact();
                        dummy.Name = item.name;

                        contactList.Add(dummy);
                    }

                    MainLongListSelector.ItemsSource = contactList;
                }
                catch
                {

                }
            }
        }

then Replace your MainPage phone:LongListSelector's Code with this.

<phone:LongListSelector x:Name="MainLongListSelector" Margin="0,150,0,0" ItemsSource="{Binding }" >
                <phone:LongListSelector.ItemTemplate>
                    <DataTemplate>
                      <StackPanel Margin="0,0,0,17">
                          <TextBlock Text="{Binding Name}" TextWrapping="Wrap" Style="{StaticResource PhoneTextExtraLargeStyle}"/>
                      </StackPanel>
                    </DataTemplate>
                </phone:LongListSelector.ItemTemplate>
            </phone:LongListSelector>


We are done.. compile and check :)


Thanks ...


Full Code In Media Fire 
http://goo.gl/UrRjY7


Monday, March 10, 2014

Making HTTP Post Request

Here is the correct way to send POST using HTTP Client

  var client = new HttpClient();
            var postData = new List<KeyValuePair<string, string>>();
            postData.Add(new KeyValuePair<string, string>("param1", "value"));
            postData.Add(new KeyValuePair<string, string>("param2", "value"));

            HttpContent content = new FormUrlEncodedContent(postData);

            var response = await client.PostAsync("Post URL", content);
        

Sunday, March 2, 2014

Working with JSON and HTTP requests

In this post I'm gonna demonstrate how to working with HTTP requests and JSON in Windows Phone and Windows store Applications.

I'm demonstrating Windows Phone App here, there is no different withe method if you are in the Windows Store app either.

1. Create new Windows phone App. I'm using default Windows Phone Data bound App template here.


2. Then Go to the ViewModels -> MainViewModel in the Solution Explorer and find the
  public void LoadData()
and clear all codes in it.

3. We are going to use iTune search Service.. Here is the Http GET url for it. You can try it with your browser too
http://itunes.apple.com/search?term=metallica

4. To handle Http Requests we need to install additional Nuget Package in to the project.
Tools -> Nuget Package Manager -> Package Manager Console
In the console then type

Install-Package Microsoft.Net.Http
 
Then Press enter.. You need internet connection to install it. I'll post later abut Nugets

5. Then change LoadData() as async
  public async void LoadData()  

for get the response from the Service use following code


 public async void LoadData()
        {
            // Sample data; replace with real data
            //this.Items.Add(new ItemViewModel() { ID = "0", LineOne = "runtime one", LineTwo = "Maecenas praesent accumsan bibendum", LineThree = "Facilisi faucibus habitant inceptos interdum lobortis nascetur pharetra placerat pulvinar sagittis senectus sociosqu" });

            HttpClient client = new HttpClient();

            string jsonResponse = await client.GetStringAsync("http://itunes.apple.com/search?term=metallica");


6. Response cumming as a string we need to convert it to Objects , it will helpful to manage it
for that install Newtonsoft.Json Package in Nuget Package Manager as same as Microsoft.Net.Http

PM> Install-Package Newtonsoft.Json

then de-serialize the string in to code... we need classes to convert this string to objects.

7. For that, get the Json response string . (Put break point below this line)
 string jsonResponse = await client.GetStringAsync("http://itunes.apple.com/search?term=metallica");

Copy it and

go to the http://json2csharp.com/
paste and click on Generate It will give You class set that you need to de-serialize Json
Add those classes to the namespace  I changed RootObject to songRoot

8. Here is the code part for de-serializing


songRoot deserialized = await JsonConvert.DeserializeObjectAsync<songRoot>(jsonResponse);


9. We are done.. Then bind the data as  you want.. Here is my total code in LoadData(). None of other codes are change.


public async void LoadData()
        {
            
            HttpClient client = new HttpClient();

            string jsonResponse = await client.GetStringAsync("http://itunes.apple.com/search?term=metallica");

            //for deserialize json and get the class
            songRoot deserialized = await JsonConvert.DeserializeObjectAsync<songRoot>(jsonResponse);

            foreach (var item in deserialized.results)
            {
                this.Items.Add(new ItemViewModel()
                {
                    ID = item.trackId.ToString(),
                    LineOne = item.trackName,
                    LineTwo = item.trackPrice.ToString(),
                    LineThree = item.trackCount.ToString(),
                });
            }

            this.IsDataLoaded = true;
        }


Enjoy


Full Code In Media Fire 
http://bit.ly/NJqpAb


Friday, February 14, 2014

Consume .asmx Service References Using Windows Strore Apps

Please note that this is not database related post. I'm recently working on windows store app development. In one scenario I have been pushed to consume .asmx web services. At that time there were no other resources to follow for me. I found this methods using some unorthodox way. In last few days several of individuals ask about consuming web services in Store apps specially .asmx.

Here we go,

1. Add service reference to the project. (Service1)

2. Create   Service1SoapClient object for consume service


3.  Assume that your imported Service1 contains method that returns string and method is GetServiceData(). Therefore you need to create object called GetServiceDataResponse nameOfResult  

nameOfResult variable gets response asynchronously  from web service


 4.  Then you can get the response body (actual response we need) fro called nameOfResul like this.


5. Then you can use this string as you wish. This string is the actual string that return by GetServiceData()

Enjoy..... :)