Showing posts with label Visual Studio. Show all posts

Saturday, July 5, 2014

Universal Apps in Visual Studio

With Visual Studio 2013 Update 2 You can see the new changes in New project dialog box in Visual studio. One of them are new project type called Universal App.

With this kind of project template we can create Universal apps fro  Windows 8.1 and Windows Phone 8.1 once with same solution .


Once project  created in solution explorer you can see that there is  three separate projects


1. Windows 8.1
2. Windows Phone 8.1
3. Shared

With this templates it does is it shared separate section (such as project here) for Model (Coading part and data manipulation).
 All Projects in these ki of solution used that shared code for data manipulation.


With other two projects each one implements their platform specific User interfaces and functionalists with those projects. In here your Windows 8.1 UI codes should be in Windows 8.1 Project and Windows Phone UI codes must be in Windows Phone 8.1 Project.

 As you can see here each project refers the shared code base


And Specialty both Windows 8.1 and Windows Phone 8.1 Projects are sharing the same App.xaml and App.xaml.cs file. That means it defines the all application build settings to the each platform.

If you need to change something on Windows Phone 8.1 App you need to add that code in between 
#if WINDOWS_PHONE_APP
//Code 
#endif


In Compiling the project you can select which project need to be run like below with debug menu


And finally... Better to add 3rd party references separately with Windows 8.1 an Windows Phone 8.1 projects because there may be some derivations among libraries with two platforms..


Enjoy your Universal app with Visual Studio 203 update 2


Thursday, June 26, 2014

Roslyn (Next Version of C# Compiler ) part 01

This article is about what is available in C# 6.0 with next version of compiler. You can have the binaries from roslyn.codeplex.com and use it. Here im going to demonstrate some key futures that useful in day to day programming .


1. Indexed Members and Element Initializers

There is several versions of it. Here is example for assign collection when it initialize in the code,
Ex : List<Ttype,Tvalue>

 Dictionary<string, string> sampleDemo = 
    new Dictionary<string, string>()
  {
    {"Mango", "Yellow"},
    {"Banana", "Green"},
    {"Pineapple", "Orange"},
    {"Apple", "Red"}
  };

//You can access each element like here
var c = sampleDemo ["Mango"];


indexed Members with $ mark

 Dictionary<string, string> sampleDemo = 
    new Dictionary<string, string>()
  {
    $Mango="Yellow",
    $Banana="Green",
    $Pineapple="Orange",
    $Apple="Red"
  };

//You can access each element like here
var c = sampleDemo.$Mango;

indexing with Json data

Code:
string JsonData =@"{"widget": {
    "debug": "on",
    "window": {
        "title": "Sample Konfabulator Widget",
        "name": "main_window",
        "width": 500,
        "height": 500
    },
    "image": { 
        "src": "Images/Sun.png",
        "name": "sun1",
        "hOffset": 250,
        "vOffset": 250,
        "alignment": "center"
    },
    "text": {
        "data": "Click Here",
        "size": 36,
        "style": "bold",
        "name": "text1",
        "hOffset": 250,
        "vOffset": 100,
        "alignment": "center",
        "onMouseUp": "sun1.opacity = (sun1.opacity / 100) * 90;"
    }
}}";


//You can access each element like here
JObject jObject = JObject.Parse(JsonData );
  var output = jObject.$window.$Keyword);


Thanks and enjoy... Meet with next post with another feature

Friday, March 14, 2014

Working with LiveSDK

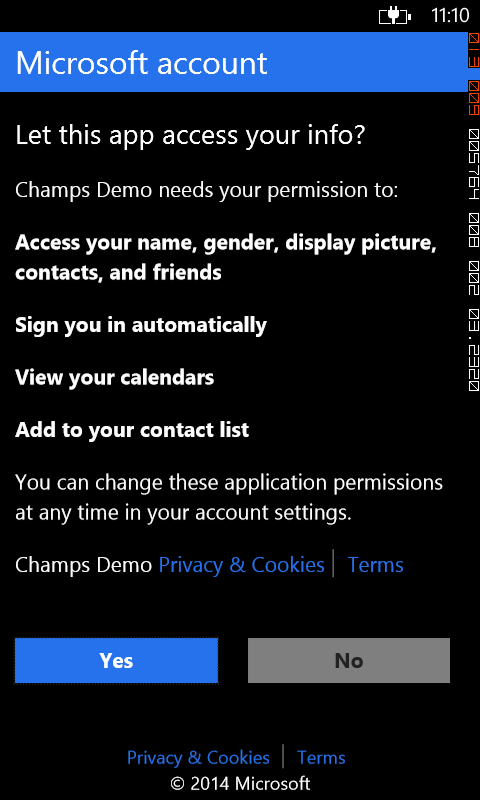
Live SDK enables you to make connect users in to Live account.

As a developer you can access each logged users
  1. Contacts.
  2. Calender.
  3. Sky drive (one drive).
In this post i'm gonna explain how to use Live SDK and demo about how to get Contacts :)


Here we go,
First You need to have Live App
To create live app goto  http://msdn.microsoft.com/en-US/live/  and in there in My Apps tab create your own app .. We need CLIENT_ID for our Mobile Application.

Installing LiveSDK 
  Create New Windows Phone Databound App

  Go to Tools -> Nuget Package Manager -> Package Manager Console In the console then type


 Install – Package LiveSDK
 Or 
You can use Visual Studio Extension Manager and search LiveSDK and install 

Add Login Button to Application
Go to XAML page that yo want to add Login Button and Paste this inside the Header. 

xmlns:live="clr-namespace:Microsoft.Live.Controls;assembly=Microsoft.Live.Controls"


Then add your XAML Button from this code .(Replace CLIENT_ID to your App's CLIENT_ID)
 <live:SignInButton Scopes="wl.basic wl.signin " ClientId="CLIENT_ID" Branding="MicrosoftAccount" SessionChanged="SignInButton_SessionChanged" VerticalContentAlignment="Top" Height="100" Margin="-10,0,10,497" VerticalAlignment="Bottom"/>
            

Scopes ??
Scopes define what kind of data that you can access through your app. This link provide detailed summery of Scopes in Live Client
http://msdn.microsoft.com/en-us/library/live/hh243646.aspx   

**In My case for just access the contacts I don't need any extended scopes just wl.basic wl.signin is enough.

assume you need to access user calender for that you need to add another field to Scopes as wl.calendars

Then Add This Code part to your C#

private async void SignInButton_SessionChanged(object sender, Microsoft.Live.ControlsLiveConnectSessionChangedEventArgs e)
        {
            if (e.Status == LiveConnectSessionStatus.Connected)
            {
                client = new LiveConnectClient(e.Session);
                try
                {
                    LiveOperationResult result = await client.GetAsync("me/contacts");
                    dynamic opresult = result.Result;

                    List<contact> contactList = new List<contact >();

                    foreach (var item in opresult.data)
                    {
                        contact dummy = new contact();
                        dummy.Name = item.name;

                        contactList.Add(dummy);
                    }

                    MainLongListSelector.ItemsSource = contactList;
                }
                catch
                {

                }
            }
        }

then Replace your MainPage phone:LongListSelector's Code with this.

<phone:LongListSelector x:Name="MainLongListSelector" Margin="0,150,0,0" ItemsSource="{Binding }" >
                <phone:LongListSelector.ItemTemplate>
                    <DataTemplate>
                      <StackPanel Margin="0,0,0,17">
                          <TextBlock Text="{Binding Name}" TextWrapping="Wrap" Style="{StaticResource PhoneTextExtraLargeStyle}"/>
                      </StackPanel>
                    </DataTemplate>
                </phone:LongListSelector.ItemTemplate>
            </phone:LongListSelector>


We are done.. compile and check :)


Thanks ...


Full Code In Media Fire 
http://goo.gl/UrRjY7


Monday, February 17, 2014

Peek Definition in VS 2013

 What is Peek Definition ? 

   Peek Definition  enable you to view and edit code without switching away from the code that you're writing. Its just only enables with Visual Studio 2013.
Go To Definition is the functionality that did the same thing in earlier versions in Visual Studio but the different between Go To Definition and Peek Definition is Peek Definition shows the code in popup.


How to enable Peek Definition ?

Option 01 :  Go to code segment that you need to see the definition. keep courser on it and R- Click    ->   From the menu select Peek Definition  


Option 02 : Go to code segment that you need to see the definition. keep courser on it then Press (ALT + F12) 

Peek Definition is in light blue window


You can load Peek Definition inside the popup in same manner as well ..


Enjoy coding :)